My Maillard freewheel tool arrived from the UK arrived this weekend. (SIDEBAR - its always shocking how fast and cheap international shipping can be, but to UPS a small item CONUS without a corporate account is in full bend over territory. Whatevs.)
Luckily there was a nice, simple how-to vi on youtube on how to break down and rebuild a Maillard freewheel from a nice chap in Europe. Knowing what needs to be unscrewed in which direction to undo this puzzle box is key. Sucker sure was on tight, had to clamp the ever living shyte out of it on the jig table and break out a cheater bar to pop the threads loose.
Had that park tool whip flexing within an inch of its life.
View attachment 121222
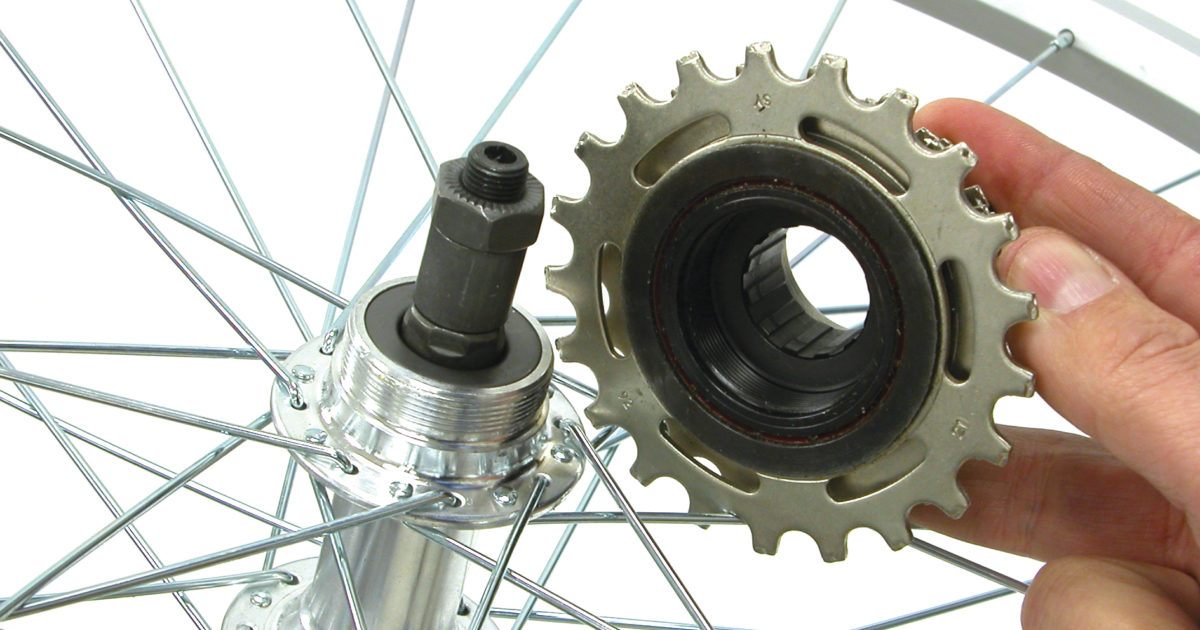
Once apart, you can separate all the cogs and spacers from the freewheel mechanism.
View attachment 121224
I disassembly the freewheel ratchet as well, cleaned them all up, added new ~100new 1/16 ball bearings and she spins quite nice now.
However... i recently found that while cleaning the rear hub, the bearing cups are pretty scored. I tried polishing them out but its kinda bad. I didn't get a good pic of it but its something you can feel with a fingernail. Maybe it'll be fine for the 1-2 times a year i ride this for old times sake though.
Are replacement bearing cups a thing?
View attachment 121226