Red Mosquito
Formerly RLB the Scrapple Boy
is making new doors a possibility?


terrible particle board construction, all gots to go. Gutting and starting new, the tiles are that funky light mauve hue.is making new doors a possibility?
Rip down side wall,This is the bath in the au pair suite, so was everything was super low end in 1990ish. The right wall is opposite to the tub fixtures.
View attachment 66751

LolI really have to write this one down.
5 hours to change 3 light bulbs.
Not really DIY, cause someone is paying for this. And as i told @mattybfat, i get paid to change light bulbs these days.
Received a call from a potential client. She is a realtor, and will be selling her house in a few years. She has a short list
of replacing discolored switches, some light fixtures, and a few other items. One of them is to replace the bulbs that are
20' in the air, cause they are burnt out.
Not a problem. I have the tools to get to the recessed light bulbs.
it looks like this.
View attachment 66991
impressing a realtor is money in the bank. They often need things done on short notice, at a premium rate.
with that in mind......
So i put up the pole, and take out the first bulb, easy peasy. I put the new bulb in, and it comes on right away.
OK, it is a weird switch, so i go mess with it. the bulb wont go off. I pull the switch, cause i'm going to change it
anyway, and find that it is an old X10 scene controller. Which means there is a/are light modules somewhere.
I find them in the attic, in a box, in a crappy place. There was no reason to put it where it was, other than saving
5' of wire.
Anyway, i back the bulb out, and discuss the options with the homeowner. I'm tasked with getting a new
switch, and any other parts needed. She doesn't care if it dims, and doesn't care if they all come on at once.
all of that took about 1 hour (i replaced some other switches at the same time.
Takes me about 1/2 hours to find the parts and order them. Combo of smile.amazon, and x10.com
Back to the house today. One of the options we discussed is going to LED so they would never burn out before the house
collapses. She purchased new LEDs in the correct size, and color temp. 2700k for a nice warm look.
I replace the old scene controller with the new one. Set the old light modules to the same address. Hit the on switch,
and all 3 lights come on. I'm done. Maybe 2.5 hours into it - maybe.
I ask if she really wants the LEDs installed - and she says yes. Ok, install the first two, turn the lights on to make sure
they working, and they are a different color. Seriously. Now there are two dimming modules controlling these lights.
When LEDs dim, they don't change color, just intensity. But i figure i should go to one module anyway, just in case.
As expected, it didn't make a difference.
I pull the bright bulb down, and it is a 5000k bulb - basically bright white. Let's call it dentist office white.
its model number does not match the one on the box. I put up a new one. i'm into it for 3+ hours now.
OK, bulb #3. I put the pole up, and the bulb is being stubborn (last one always is.) - and something falls out of the fixture.
I immediately know what it is - the depth adjusting wingnut and carriage bolt for the light base. the light comes out, and the base
is hanging there. so this isn't the end of the world, i could just put the ladder up, and deal with it. But there is a 70 year old baby
grand piano under it. fml
The lights are remodel cans, so they can be dropped down - but then what? there is 10' of extra electrical cable, so i'll drop it and see if i can reach it off my small ladder.
Of course i can't - and i find that i have to disconnect the bezel, to disengage the clips that hold the can in place. those are held by springs, which can't be accessed from
outside the can. i'mma gunna need a solution.
4+ hours mark.
So i pull the light back up into the attic (did i mention it is now 3pm, and the attic is 90+ ??) Disconnect the electric, and lower the canister down
by a couple pieces of cord i had in the truck. Put the bolt/wingnut back in place, adjust the depth. I thread some cord through the outside of the can
onto the springs for the bezel - the plan is to pull the strings to access the springs to reset the bezel from outside the can.
Back up into the attic - pull the can up, set the remodel clips. I'm sweating like a pig, and laying over a bunch of joists with the
open side of fiberglass insulation. Now to set the bezel. Of course the way i have the fixture oriented, one spring is towards me, and
the other is impossible to see without contortions. I contort. after 20 minutes or so of fighting, the can is back in place, the electric is connected,
things in the attic are buttoned up.
I head downstairs, close up the attic, and test the switch one more time. It is turning on the two installed bulbs. I install the third bulb, and it works, and
is matching the others. I clean up all the crap that fell, pack everything, chat with the homeowner, and put all the tools back in the truck......
knocking on the door of 5 hours. and a $40 switch.
i'm glad i didn't give her a fixed price.......
She keeps adding to the list of things to do......
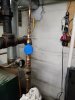
Spent yesterday morning installing a water meter on the auto feeder to our steam boiler. This should allow proper monitoring of corrosion inhibitors.
Haha, I need to change 6 bulbs to LED at the same height at my place and also changing to dimmers. I have not interest in doing so till it's time to sell.I really have to write this one down.
5 hours to change 3 light bulbs.
Not really DIY, cause someone is paying for this. And as i told @mattybfat, i get paid to change light bulbs these days.
Received a call from a potential client. She is a realtor, and will be selling her house in a few years. She has a short list
of replacing discolored switches, some light fixtures, and a few other items. One of them is to replace the bulbs that are
20' in the air, cause they are burnt out.
Not a problem. I have the tools to get to the recessed light bulbs.
it looks like this.
View attachment 66991
impressing a realtor is money in the bank. They often need things done on short notice, at a premium rate.
with that in mind......
So i put up the pole, and take out the first bulb, easy peasy. I put the new bulb in, and it comes on right away.
OK, it is a weird switch, so i go mess with it. the bulb wont go off. I pull the switch, cause i'm going to change it
anyway, and find that it is an old X10 scene controller. Which means there is a/are light modules somewhere.
I find them in the attic, in a box, in a crappy place. There was no reason to put it where it was, other than saving
5' of wire.
Anyway, i back the bulb out, and discuss the options with the homeowner. I'm tasked with getting a new
switch, and any other parts needed. She doesn't care if it dims, and doesn't care if they all come on at once.
all of that took about 1 hour (i replaced some other switches at the same time.
Takes me about 1/2 hours to find the parts and order them. Combo of smile.amazon, and x10.com
Back to the house today. One of the options we discussed is going to LED so they would never burn out before the house
collapses. She purchased new LEDs in the correct size, and color temp. 2700k for a nice warm look.
I replace the old scene controller with the new one. Set the old light modules to the same address. Hit the on switch,
and all 3 lights come on. I'm done. Maybe 2.5 hours into it - maybe.
I ask if she really wants the LEDs installed - and she says yes. Ok, install the first two, turn the lights on to make sure
they working, and they are a different color. Seriously. Now there are two dimming modules controlling these lights.
When LEDs dim, they don't change color, just intensity. But i figure i should go to one module anyway, just in case.
As expected, it didn't make a difference.
I pull the bright bulb down, and it is a 5000k bulb - basically bright white. Let's call it dentist office white.
its model number does not match the one on the box. I put up a new one. i'm into it for 3+ hours now.
OK, bulb #3. I put the pole up, and the bulb is being stubborn (last one always is.) - and something falls out of the fixture.
I immediately know what it is - the depth adjusting wingnut and carriage bolt for the light base. the light comes out, and the base
is hanging there. so this isn't the end of the world, i could just put the ladder up, and deal with it. But there is a 70 year old baby
grand piano under it. fml
The lights are remodel cans, so they can be dropped down - but then what? there is 10' of extra electrical cable, so i'll drop it and see if i can reach it off my small ladder.
Of course i can't - and i find that i have to disconnect the bezel, to disengage the clips that hold the can in place. those are held by springs, which can't be accessed from
outside the can. i'mma gunna need a solution.
4+ hours mark.
So i pull the light back up into the attic (did i mention it is now 3pm, and the attic is 90+ ??) Disconnect the electric, and lower the canister down
by a couple pieces of cord i had in the truck. Put the bolt/wingnut back in place, adjust the depth. I thread some cord through the outside of the can
onto the springs for the bezel - the plan is to pull the strings to access the springs to reset the bezel from outside the can.
Back up into the attic - pull the can up, set the remodel clips. I'm sweating like a pig, and laying over a bunch of joists with the
open side of fiberglass insulation. Now to set the bezel. Of course the way i have the fixture oriented, one spring is towards me, and
the other is impossible to see without contortions. I contort. after 20 minutes or so of fighting, the can is back in place, the electric is connected,
things in the attic are buttoned up.
I head downstairs, close up the attic, and test the switch one more time. It is turning on the two installed bulbs. I install the third bulb, and it works, and
is matching the others. I clean up all the crap that fell, pack everything, chat with the homeowner, and put all the tools back in the truck......
knocking on the door of 5 hours. and a $40 switch.
i'm glad i didn't give her a fixed price.......
She keeps adding to the list of things to do......
Haha, I need to change 6 bulbs to LED at the same height at my place and also changing to dimmers. I have not interest in doing so till it's time to sell.
Haha, I need to change 6 bulbs to LED at the same height at my place and also changing to dimmers. I have not interest in doing so till it's time to sell.
1/10, did it already, would not recommend.
you got an app for that????
check the pitch on the horizontal flue, and seal that sucker up with high-heat permatex!!!
i went with LED retrofit in in my kitchen at 2900k, dimmable @9w, mostly 5" and a couple 4" over the sink. They were not from HD.
Happy with the results. Good color, good range, no flicker. Probably need to up the wattage for something that high in the air.
Problem is the dimmers are so expensive.......
the ones i replaced in that house were the par 38 flood with edison base. So the suction cup on the pole worked.
they were a good match to the 95w incandescents which they replaced.
I love my simple 60s home.
Looking to move my kiddo to another room and reclaim some furniture. Has anyone refinished dressers and the like in white color? types of paints to use, applications, and methods?
Thank you
My wife loves using "chalk paint" on old stuff. Annie something or other.I love my simple 60s home.
Looking to move my kiddo to another room and reclaim some furniture. Has anyone refinished dressers and the like in white color? types of paints to use, applications, and methods?
Thank you
Ours were Edison screws, too, but the cans juuuuust fit the bulbs. Had to use the 'suction' attachment to remove the old ones. Two feel off, one hit me, even after wetting the cup. The LED replacement bulbs easily fit a basket, so no problem there.
Ours are entry way, so they are just on/off.
Any suggestions for low-profile, aimable LEDs for flush mounting in a ceiling?
What to do with the flood variety with the dimples? Suctions don't wotkdon't wet the suction cup! that makes it great in tension, but horrible in shear. as soon as it tips, the bulb slides off!
do clean the suction cup first tho.
i'm still using halogen for spot lights - i have a bunch of different beam spreads to test what i need.
they are not on very often.