The DIY thread - DIYourself

So the lights have been dimming in the house for a couple days. Seems logical with the storm, and the repair work.
Then it started happening more often - i knew just what it was. Went outside and looked up the telephone pole.
The repair they did after sandy came apart at the crimp - This is the neutral wire that balances the two legs of your electrical service.
IMG_0203.JPG

IMG_0203 - Edited.jpg


Hell no i'm not going up there. 😀

i did fix my auger head today - it is a cheap one, and i could replace it from harbor freight for $150 with a coupon.
Just because, I took it to a small machine shop, and he confirmed it was the carb, charged $15 for diagnosis, and said it would
be $125 to fix it. So that is a "no" cause i'd just get a new one.

So i jumped on amazon, and sure enough, they had a carb replacement for $15, which included the carb, new hoses and gaskets.
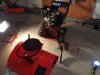
it comes, and of course need to be modified. the old throttle lever was different shape and size, so a little razor and locktite and all set.

IMG_0205.JPG

i probably shouldn't have started it in the house. even if it was less than 5 seconds, but come on man!!

so an hour of labor and $15 - looking like a small machine shop!
$30 to live another year -

 
Paying it forward.

Awhile back, @ktmrider posted up a concrete saw that had failed him. We know from his posts that time saved is his priority, so he did whatever was necessary not to delay his project.

I picked up the saw and ran a compression test. Very low. Pulled it apart and the cylinder wall looked ok. Took me a couple hours to find a reasonably priced piston ring. Ended up getting it from Poland for $5.

Fast forward a year+, I finally need the saw so I reassemble it. I have no assembly grease so I use hydraulic oil! Replace the plug and filters. Fires up in the 5th pull. Nice cloud of smoke too!

Blade is in good shape. I need to mess with the water delivery system a bit.

Consider it in the pool of public tools. Let me know if you need it.

 
After the first nor easter last weekend the snowblower wasn't throwing out the chute the way it used too. Probably because the snow was wet and sticky from the rain beforehand. The machine was a freebie from the widow 2 doors down about 8 years ago with the agreement that I clear her snow when needed. While not the most powerful machine at the time the price was right and I don't mind helping her.

Ariens 5.5 hp 24"


2nd storm coming I decided to tackle replacing the belts and not risk a breakdown especially with 15 inches predicted.

Spent the Monday morning before the storm researching parts and watching DIY videos on YouTube to get the general idea. Found the user and service manual online. Ordered the parts locally and picked up during lunch.

$60 bucks and 45 minutes later I was all done went back together perfect.

Saved $89 per hour labor fees + pickup and delivery and then not getting it back until around June since they had so many in for service already.

Next job will be to replace the carb. Or sell it for a bigger one.

Side story. Messed up my back hauling it out of the shed and trying to move the generator.

Why not tow the generator with the snowblower? Teenager son helped me guide it worked like a charm. Well except I trashed the lawn but oh well.
 

Attachments

  • IMG_9122.PNG
    IMG_9122.PNG
    546.4 KB · Views: 27
  • IMG_9084.JPG
    IMG_9084.JPG
    110.8 KB · Views: 26
  • IMG_9088.JPG
    IMG_9088.JPG
    81.1 KB · Views: 24
  • IMG_9089.JPG
    IMG_9089.JPG
    82.3 KB · Views: 25
  • IMG_9072.JPG
    IMG_9072.JPG
    107.3 KB · Views: 25
  • IMG_9078.JPG
    IMG_9078.JPG
    124.2 KB · Views: 25
@iman29 that's a good little machine, I have a similar model. The techumseh snow king is a solid engine. My only complaint is the "compact" handle bar seems to make it a little tough to control. I Should probably replace the belts on mine too, haven't don't that in the 5 years I've owned it.
 
@iman29 that's a good little machine, I have a similar model. The techumseh snow king is a solid engine. My only complaint is the "compact" handle bar seems to make it a little tough to control. I Should probably replace the belts on mine too, haven't don't that in the 5 years I've owned it.

@rlb totally agree I am 6'2" and it's a little low for me and the setup on the handles to drive the auger and drive train is a bit off but it gets the job done 95% of the time.

My 15 year old helped me this time for the first time with the machine even he said it's tricky to drive and his back hurt too. He's 5'8".

Those belts I replaced are at least 5 years old too and it was pretty easy to get it done with a basic rachet set.
 
It's actually all custom hand made.
How much info you want? Hehe

Three Channel Amplifier

Power output - Somewhere between 20 and 25 watts per channel, never measured because I don't care and nobody can probably hear the difference between 15 and 30 watts.

Tubeset:
EL84M, 7189A, 6P14P, 6P14P-EV (2 required for each of the 3 channels, total of 6)
12AX7 (1 required for each of the 3 channels, total of 3)


Exterior/General
1. Solid oak frame with polished aluminum top.
2. Custom aluminum disk feet will accept the vibrapod isolator. http://www.vibrapod.com/
2. Inputs - Gold plated RCA jacks with teflon insulators.
3. Outputs - 3 way gold plated binding posts for the speakers.
4. Power - standard IEC type cable.
5. Fuse - 5 amp slo-blow.
6. Tube sockets are gold plated in ceramic bodies.
7. The center ammeter is non-functional.

Power supply
1. Two mosfet regulated high voltage power supplies with less than .2 volts ripple.
2. The two HV power supplies feature a slow turn on so the tube set is not blasted with HV when first turned on.
3. Circuit is knock off of welborne labs's PS3. http://www.welbornelabs.com/ps3.htm
4. Four HV caps line rear of chassis. They came from a high power high voltage laser weapon project that my work never got a contract for.
5. The power supply transformer was sourced from a 1960's Fisher 300 receiver.
6. For the most part, the power supplies are all printed circuit construction.
7. The small signal 12AX7 tubes have a DC regulated heater supply circuit.
8. Solid copper core wire used to wire heaters.
9. NTC device in power supply "line" to avoid inrush currents to house.

Amplifier
1. Schematic used is the Acrosound ultralinear.
1a. The outer two output transformers do not have ultralinear taps, which required the secondary HV power supply to feed the output the necessary voltage to operate.
1b. The center output transformer is an ultralinear transformer, and is wired up in ultralinear mode.
1c. The amp is configured in the classic AB mode.
1d. The amp is a cathode biased design, no bias adjustments are needed because the cathode resistors takes care of it.
2. Point to point construction.
3. Very high quality mil spec paper/oil capacitors used in signal path, and are bypassed with high quality polypropylene film caps. I often considered ripping these caps for other projects! It's essential to use excellant quality caps in the signal path.
4. The outer two transformers were sourced from a 1960's vintage Fisher 300 receiver. The center transformer is from a ST-35 Dynaco amplifier.
5. One percent tolerance metal film resistors used when possible in the audio circuit.

looks like a really well thought out rig, got any specs on them Four HV caps line rear of chassis.

you must have efficient speakers
 
Last edited:
@rlb totally agree I am 6'2" and it's a little low for me and the setup on the handles to drive the auger and drive train is a bit off but it gets the job done 95% of the time.
I'm 6'1" and bought a new Arians 24" this year. Handles are definitely too low and no way to adjust. Sucks, but still better than shoveling by hand.
During the last snow storm I broke a shear pin and it took me way too long to realize this. I thought it was just having trouble with the ice, but the actual cause was half the auger not turning and just packing up with snow. Luckily I had two spare pins. I just ordered a 3 pack off of Amazon so that I am never without shear pins.

one can never stockpile enough shear pins in the winter. I keep mine near the beer fridge so I can drown my misery with this winter weather. Looks like we need to keep the machines ready to go again next week too... sigh. FU Winter.
 
I'm 6'1" and bought a new Arians 24" this year. Handles are definitely too low and no way to adjust. Sucks, but still better than shoveling by hand.
During the last snow storm I broke a shear pin and it took me way too long to realize this. I thought it was just having trouble with the ice, but the actual cause was half the auger not turning and just packing up with snow. Luckily I had two spare pins. I just ordered a 3 pack off of Amazon so that I am never without shear pins.

This happened to me last year as I was trying to get through the plow mound at the end of the driveway. Struggled through 75% of it before I realized I was running on 1/2 the auger. Luckily I had a few spares but I agree with @iman29, I stocked up on shear pins too.
 
wow thats alot of work in not alot of space.

I normally work with the door open so it's not that tight.. The shop itself is a just big enough to be workable I wish it was 2ft wider and I'd be much happier. But when we built it we couldn't get clearance from the town for 2 ft more space. Engine runs perfectly finished up today
 

Attachments

  • Screenshot_20180320-171940.png
    Screenshot_20180320-171940.png
    581.7 KB · Views: 11
i was referring to the engine bay actually, the shop looks spacious next to my garage, which is basically squeezing room only around one side of the car once its in. (at least for now, i intend to change from 2 single doors to 1 double so i can center a car if needed)
 
i was referring to the engine bay actually, the shop looks spacious next to my garage, which is basically squeezing room only around one side of the car once its in. (at least for now, i intend to change from 2 single doors to 1 double so i can center a car if needed)
OH yea.. The car is tight. I can swap and install and engine in a camaro faster than I could just to remove this little engine. The shop is 24x18 380ish sqft. Wish it was a 24x20 lol

Maybe one day I'll post the garage build thread up here
 
Back
Top Bottom