Book of Paul H

No links that I know of. Here is a quick summary of what I had done:

Took a box that fit the frame and hung it in there with hanger wire so that it didn't touch the inside.
Bought a piece of about 4" diameter metal duct, cut a hole at the narrow end of the box right towards the bottom the same diameter as the duct piece and stuck it in just enough so that it stays put.
At the top on the far end I cut a few flaps so that I can let air out and try to control temperature.
Poked a kitchen thermometer into the top to keep track of temperature.
Placed the heat gun on the ground with the tip sticking in the metal duct.
Turned the heat gun on and monitored the temp, turning it on and off if I needed to.
I believe I tried to keep the temp inside around 150 - 175 Deg.
Did this outside and stayed with it just in case I set something on fire.

I didn't really put too much effort into the polishing. Just enough to have a decent shine.

Lol, thanks for writing that all out, but I think would just let it sit for 2 weeks between color 1 / color 2 / clear coat / shine. Maybe @C8N will give it a try.
 
Lol, thanks for writing that all out, but I think would just let it sit for 2 weeks between color 1 / color 2 / clear coat / shine. Maybe @C8N will give it a try.
I'm keeping an eye out in my complex dumpster for a box that will fit the frame.
 
Damn... I thought I had a bottom pull FD but nope.... sucks!
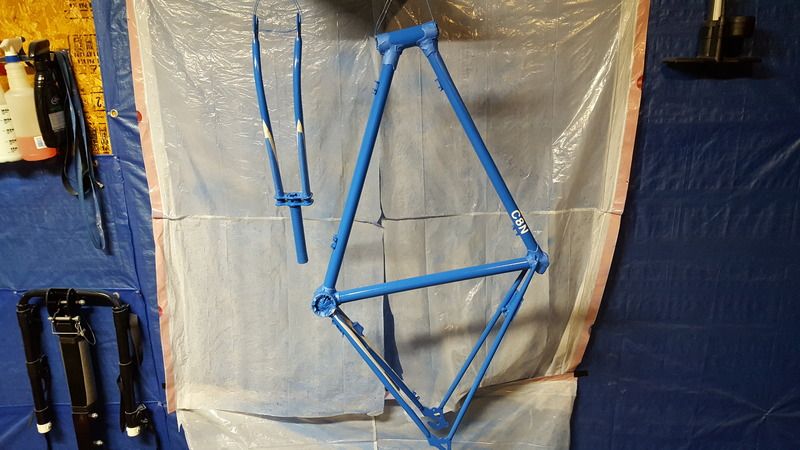
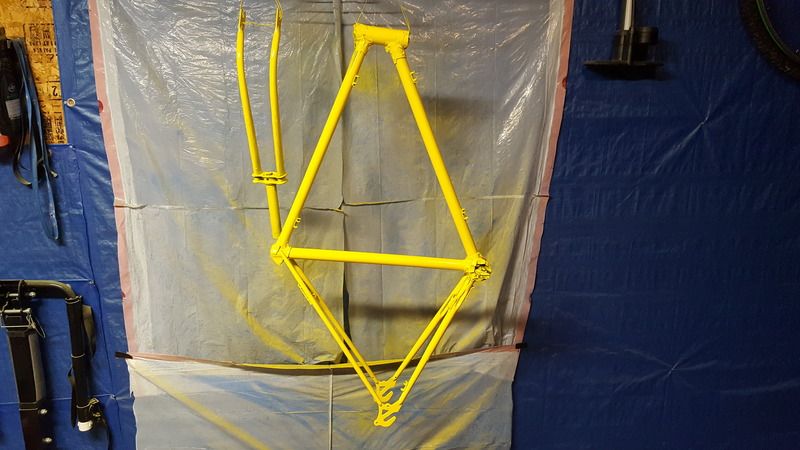
On a brighter note, the POSS is taped up and ready for yellow.

20161002_151937.jpg
 
Yellow is on... but I have a bad feeling about this. Don't get me wrong, I like the color. The yellow is a tad bit deeper than what the picture shows but I kinda went crazy with the rattle can. I think I rushed it a bit. I got a feeling the blue thats underneath the tape will get soaked. Prolly will need to touch them up with a fine brush or something. Wednesday will be the 2nd coat of yellow and the tapes will come off on Friday. Will see how it holds up. Assuming all is good, the clear will go on on Friday and Sunday. Will wait a week and sand and polish the finish on the following Saturday. Will start putting parts on starting Sunday. At least thats the plan.

20161003_191942.jpg
 
Last edited:
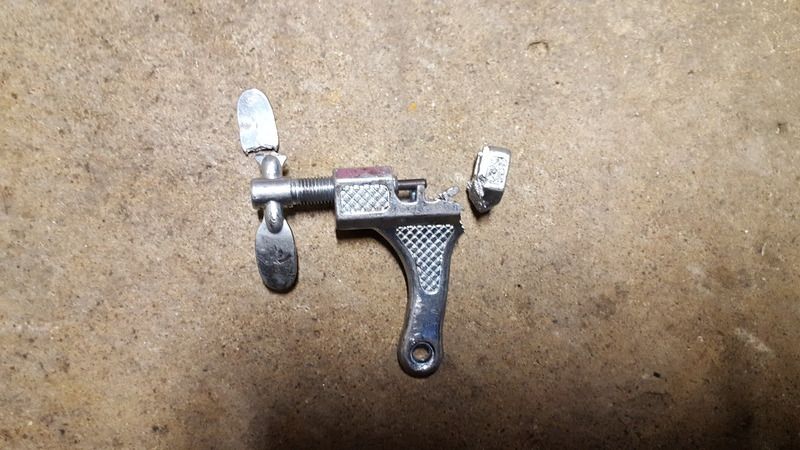
Has anyone had a chain do this? I realize its a cheap chain breaker but still....

20161005_211627.jpg
Does the pin pusher part not have a pointier tip? Or did it break too? Were you definitely pushing against the pin? Could also be a cheap Alibaba tool.:rolleyes:
 
You sure you weren't pushing the pin against the outer part of the chain tool and not into the gap?
Does the pin pusher part not have a pointier tip? Or did it break too? Were you definitely pushing against the pin? Could also be a cheap Alibaba tool.:rolleyes:
It did have a pointer... and yep... the pointer was pushing against the pin.
It took a few good whacks with a hammer for the pin to come out. Yes crappy walmart tool but in its defense... the chain was on the bike for a good 6-7yrs I think. I am pretty sure it was the original chain on a 2010 model year bike that I bought used.

BTW... got anxious and took off the tape off of the POSS. My fears were right... the yellow seeped into the tape. The lines are pretty fuzzy and there is yellow where it shouldn't be. At best, its a 10ft bike. Any closer, it looks like shit. Not to mention, totally not what I had pictured. The shade of blue does not go well with the yellow. Crayola blue and yellow. Looks like a clown bike! At least no one will steal it. lol

Just gonna clear coat it and be done with. Too many areas to fix with a brush.
 
My old Nashbar chain breaker did something like that but not as extreme. Your chain breaker looks pretty ghetto yo, lol.

Strip paint and redo! ;)

How about sanding it down very roughly and going over the whole thing with the blue?
 
My old Nashbar chain breaker did something like that but not as extreme. Your chain breaker looks pretty ghetto yo, lol.

Strip paint and redo! ;)

How about sanding it down very roughly and going over the whole thing with the blue?
Yeah it was a cheapo. It was a saddle bag breaker. I also have a breaker for the tool box but when I tried with it, I saw the pointer bending and didn't want to break it. The saddle bag one was expendable so just went for it.

Too much effort to strip and repaint. If it was a half decent frame, I might but not worth the trouble. Who knows... I might redo things at a later point if I get bored but not now. Just gonna finish it up and ride it. It's a lol bike but at the same time... I don't think it's horrible. I'll snap a pic so you guys can get a good laugh out of it.
 
About 8ft away... terrible?
[GALLERY=media, 1172]20161006_063717 by C8N posted Oct 6, 2016 at 6:58 AM[/GALLERY]

Close ups
[GALLERY=media, 1173]20161006_063737 by C8N posted Oct 6, 2016 at 6:58 AM[/GALLERY][GALLERY=media, 1174]20161006_063750 by C8N posted Oct 6, 2016 at 6:58 AM[/GALLERY]
Bad....
 
About 8ft away... terrible?
[GALLERY=media, 1172]20161006_063717 by C8N posted Oct 6, 2016 at 6:58 AM[/GALLERY]

Close ups
[GALLERY=media, 1173]20161006_063737 by C8N posted Oct 6, 2016 at 6:58 AM[/GALLERY][GALLERY=media, 1174]20161006_063750 by C8N posted Oct 6, 2016 at 6:58 AM[/GALLERY]
Bad....

I like the concept. Should have mentioned that for the detail areas you need to use a tape like this:

https://www.amazon.com/gp/product/B000SMZN02/ref=oh_aui_search_detailpage?ie=UTF8&psc=1

Do all the edging with it making sure its tight on the surface and then use the the blue masking tape over that to cover the parts you don't want painted.
 
Too much effort to strip and repaint.

I think you can just take a medium grit sandpaper and just run over the paint and few times. Just so you can get a rough surface to start on. Then prime than paint again. No need to go all the way down to the metal.
 
I like the concept. Should have mentioned that for the detail areas you need to use a tape like this:

https://www.amazon.com/gp/product/B000SMZN02/ref=oh_aui_search_detailpage?ie=UTF8&psc=1

Do all the edging with it making sure its tight on the surface and then use the the blue masking tape over that to cover the parts you don't want painted.
I used the painters tape to cover the blue. But I think what went wrong was that I was too concerned about the paint lifting that I didn't apply firmly enough and I went too crazy when spraying down the yellow. Last night, I reapplied the tape and went over it with a brush in some areas and it came out better.
I think you can just take a medium grit sandpaper and just run over the paint and few times. Just so you can get a rough surface to start on. Then prime than paint again. No need to go all the way down to the metal.
I looked at it again last night and it's not terrible and I'm OK with it... or maybe it's growing on me... or my laziness is getting the better of me... IDK. Lol
I am going to revise what I said before and now say it's a 5ft bike. lol

And to be totally honest... not sure if I can do a better job the 2nd time around. Cutting the tape wasn't too easy even with an exacto knife. The tape either started peeling or just breaking at the wrong spots. Not to mention, when it didn't cut all the way thru and you don't know about it... it gets f'ed up when you try to take off the excess tape. I lack the skills and patience for this type of work.
 
Last edited:
I used the painters tape to cover the blue. But I think what went wrong was that I was too concerned about the paint lifting that I didn't apply firmly enough and I went too crazy when spraying down the yellow. Last night, I reapplied the tape and went over it with a brush in some areas and it came out better.

I looked at it again last night and it's not terrible and I'm OK with it... or maybe it's growing on me... or my laziness is getting the better of me... IDK. Lol
I am going to revise what I said before and now say it's a 5ft bike. lol

And to be totally honest... not sure if I can do a better job the 2nd time around. Cutting the tape wasn't too easy even with an exacto knife. The tape either started peeling or just breaking at the wrong spots. Not to mention, when it didn't cut all the way thru and you don't know about it... it gets f'ed up when you try to take off the excess tape. I lack the skills and patience for this type of work.
As for the tape thing, this is why you use the tape linked above. Think of it as pinstriping tape. It's thin to lay out for designs for a crisp edge, then use regular blue tape behind that line for coverage. Next time.
 
Back
Top Bottom