The DIY thread - DIYourself

stb222

Love Drunk
Jerk Squad
Closer
B35E96CC-43AA-4F9C-8885-19F66B4E77C9.jpegB7814242-56E4-427E-A120-D11921EAD681.jpegF98FC96B-AF8C-4332-97A8-A1E3CF7831DE.jpeg
4A2E2114-ADF5-4A0B-970F-70AEFC9B5661.jpeg
yeah the doors look funny but I wanted to maintain the top edge.
Remaining is trimming those poles, the handle rail on the stairs (paint and install), trim on the open side of the stairs, move door at top of stairs to the last unfinished closet and install barn door in its place. Then paint touch ups.
 
Last edited:

Patrick

Overthinking the draft from the basement already
Staff member
P
Mines gonna look like that soon, lol. Gonna put in a few tandem breakers to free up some space for a portable generator, not going to use a transfer switch, maybe just an interlock kit to make sure the main stays off when the generator is turned on. And I need space for a Tesla wall charger. Think I'm gonna run conduit for that instead of romex. With the conduit I can run 6awg for a 60amp circuit, with romex I'd need 4awg, and that crap is expensive (it'll be about 70' from the panel). The charger could be setup for a 50amp circuit, so I could get away with 6/3 romex, and I will set it up as a 50amp circuit because I only have a 150 amp main anyway. But if I ever upgrade to a 200amp service it would be nice to set the wall charger up to it's maximum capacity.

I guess I could also just take off the breaker for the well water to free up room as well. It's only used for the sprinkler system and I haven't turned that on for a few years now, the clover keeps the lawn looking green with minimal water so I don't need the added expense.
View attachment 144199
Put in two tandems. Run the 60. If it trips the mains, which it won’t, then set the charger lower. #yolo
 

w_b

Well-Known Member
I couldn’t believe how cheap it was to get our 2x200A upgrade. My hot tub would throw out the a/c , other crap, bunch of bullshit. Fixed it all in a half a day. Never DIY when you cutting the mains.
 

jmanic

JORBA Board Member/Chapter Leader
Staff member
JORBA.ORG
Team MTBNJ Halter's
This project took a while, but where’s the fun in rushing things?

I now have 4 listening zones-

Z1: Screen porch- Polk Atrium 4s
AB8DAFDB-CAA2-4995-B9BB-5C5657187024.jpeg

Z2: living room- Klipsch R51Ms
2C2A8D19-29E3-4121-A91C-F86D869733D2.jpeg

Z3: Kitchen ceiling- Polk MC80s, courtesy of a sweet NIB deal from @Patrick
Thanks yo!
B3B367BB-87E1-4F25-9878-BE72610AD162.jpeg

Z4: Grillzebo- Polk Atrium 4s
7506FE5B-A5AA-416E-8F94-C49A5D339FA6.jpeg

All controlled via a Tivoli SBX4 protected speaker switch with independent volume controls.
DF1F1A7E-D342-45AF-A126-334B99A8BB1D.jpeg

This has been a dream for a while now, finally come true.
I had an electrician do the kitchen, and given how long it took him, I’m glad I did.

While he was here, I had him suss out the wiring to Grillzebo.
The shortest distance would have been down into the crawlspace, exit the footprint, then under about 10’ of deck.
This was largely theoretical, and probably not feasible.
Looking it over, he suggested exiting the house, then burying line in planting beds.
Huh. So a 30’ run becomes 90’, but it’s doable with the right cable and some patience.

Finished it up today-
Used some burial rated 12awg with bullet proof casing.
60AA0379-AA97-4933-A350-B026796511A5.jpeg

E40EC165-5E0B-4014-9B99-9C5482D918EB.jpeg

91790E83-E984-4650-B784-8BFBE1858E22.jpeg

ACADBBF5-D48B-4929-B503-E5DC3B179628.jpeg

Only snag was having both ends tied in and finding a knot in the line.
280B7FC0-C30E-4525-A0CF-33B036E08E5D.jpeg
Fortunately I hadn’t tacked down the lines yet, so an easy fix.

Peeps have suggested wireless speakers (my electrician’s first words- lol), but the heart wants what it wants.
Plus I had already boughten urrrything.

So very much psyched to have this in place.
Seamless audio front to back of the living space.

I have some 12awg left over, will probably replace the 16awg run in the living room. It’s short enough that 16g should be fine, but really size does matter with speaker wire.

Next installment: rehabbing/detailing the turntable.
 
Last edited:

iman29

Well-Known Member
I Have some ideas about a way to stand up the kids bikes in the basement against the wall with a hook for the front wheel Without drilling into the cinder block. The basement is unfinished so the ceiling joists are exposed.

Scored some scrap 2x4s yesterday after seeing the pile on my short bike ride yesterday just a few miles from home.

The general plan is to use something like this because I really don’t want to hang the bikes from the front wheels so I plan to have it so the bottom wheel rests on the ground or on something to support it. Kinda semi permanent because I need to get the bikes outta the garage for the winter and get my car back in. Ceilings are low in the basement too so can’t really hang them anyway.

B795D6F9-C6FF-45CF-A824-DECD10AC1EA5.jpeg084BF6C4-7B72-4259-BECD-4AF2E3990067.png
 

Mahnken

Well-Known Member
Started running the conduit for the Tesla wall connector today.

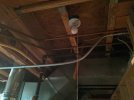
This is the first 15' or so. Came up out of the panel to the ceiling, ran out along that wall till I got to the staircase. Two 90* elbows to go around the staircase and into the mechanical room:

PXL_20201202_190550745.jpg

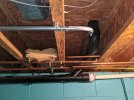
Here's where it comes into the mechanical room and the ceiling drops a foot. I should've made the drop closer to the lower ceiling, and it's my first time bending conduit so that lower bend is pretty ugly. Oh well, at least I'm the only one that's going to see it (aside from everyone reading this):

PXL_20201202_210219768.jpg

From there it goes straight till it gets here. This was another tricky bend. Hard to tell from the photo, but it bends tight to the ceiling, then bends up into the ceiling and pops out in the garage:

PXL_20201202_232722782.jpg

And here's where it comes out in the garage:

PXL_20201202_233453982.jpg

Hopefully I'll get some time tomorrow to finish up. Still have to order the wire and wall connector, lol. Tesla should be here around the 10th. Carvana picked up the Forester last night.
 

moose35

Well-Known Member
Started running the conduit for the Tesla wall connector today.

This is the first 15' or so. Came up out of the panel to the ceiling, ran out along that wall till I got to the staircase. Two 90* elbows to go around the staircase and into the mechanical room:

View attachment 144461

Here's where it comes into the mechanical room and the ceiling drops a foot. I should've made the drop closer to the lower ceiling, and it's my first time bending conduit so that lower bend is pretty ugly. Oh well, at least I'm the only one that's going to see it (aside from everyone reading this):

View attachment 144462

From there it goes straight till it gets here. This was another tricky bend. Hard to tell from the photo, but it bends tight to the ceiling, then bends up into the ceiling and pops out in the garage:

View attachment 144463

And here's where it comes out in the garage:

View attachment 144464

Hopefully I'll get some time tomorrow to finish up. Still have to order the wire and wall connector, lol. Tesla should be here around the 10th. Carvana picked up the Forester last night.
Looks good. What size conduit? Also how many amps is the charger your getting installed?
 

jmanic

JORBA Board Member/Chapter Leader
Staff member
JORBA.ORG
Team MTBNJ Halter's
Latest low invest high yield project-
A new shelf for the turntable.

The one I had in there was too shallow to open up the dust cover, so spinning vinyl meant taking the lid off and setting it aside.
My hobsession deserves better.

Grabbed some not quite furniture grade plywood (sanded?) and a piece of oak for the nosing.

Glued with the nosing 1/8” proud, then sanded flush.
I think I’ll leave it nekkid.

Good enough for the girl I go with.
27376361-52BC-4FDA-A5D9-5D51194FFB44.jpeg
Wiring on the TT dictated a floating shelf.
I would have flushed it to the left otherwise.
But I’ll say I like it aesthetically, though it makes bourbon access a little trickier.
(Duck under the shelf and to the right)

FCF87CE6-4B7C-48B1-A952-445D8FDAA37E.jpeg

2E33232E-750B-4245-9C53-9D6EADD6D28C.jpeg

Now just to re-run the living room speaker wires, police the wires in the HiFi bourbon closet and polish the TT dust cover.

Then comes the built-ins to house the LPs when @SmooveP has time.
 
Last edited:

iman29

Well-Known Member
Speaking of low invest high yield project.

I finally got around to my DIY bike storage for the basement. I have a small space to work with but I knew I wanted the bikes standing up as opposed to hanging. Ceilings are too low to hang anything anyway.

Used the free 2x4s I got last week off the side of the road and made it into this.

The bike hooks I had laying around and since i needed to vary the height of the bikes to keep the handlebars from hitting the one on the left is resting on an old
Kiddie step stool we almost threw out.

My initial design was a little flawed because I didn’t want to drill into the cinder block but the studs holding the hook would pull
Away from the wall because it was only secured in top. I solved this by dropping the stud down 1/4 inch and wedging it into place on the foundation wall ledge and then shimmed it into place. Just needs enough resistance to hold the bike. Each side has a stopper to keep the handlebars from turning.

I have one more of the kids bikes to get down there which probably means unloading all the shelves we just put up and sliding everything down to the left about 2 feet. But I want to have them all in one place at the bottom of the steps. At least I know the design works now.

One step closer to getting my car back In the garage since the August basement purge project.

586C11FD-88CB-4481-83AC-DC6207AF983A.jpeg8B30CDC9-7F55-4481-AF09-195AD08585AE.jpegF0F20820-1F4C-4D54-936A-F47D654123A2.jpeg00A3C96B-976A-4033-9DC5-AD23F5A2CB5C.jpeg
 

PRus

Active Member
Latest low invest high yield project-
A new shelf for the turntable.

The one I had in there was too shallow to open up the dust cover, so spinning vinyl meant taking the lid off and setting it aside.
My hobsession deserves better.

Grabbed some not quite furniture grade plywood (sanded?) and a piece of oak for the nosing.

Glued with the nosing 1/8” proud, then sanded flush.
I think I’ll leave it nekkid.

Good enough for the girl I go with.
View attachment 144601
Wiring on the TT dictated a floating shelf.
I would have flushed it to the left otherwise.
But I’ll say I like it aesthetically, though it makes bourbon access a little trickier.
(Duck under the shelf and to the right)

View attachment 144602

View attachment 144603

Now just to re-run the living room speaker wires, police the wires in the HiFi bourbon closet and polish the TT dust cover.

Then comes the built-ins to house the LPs when @SmooveP has time.
Why hide the equipment in the closet?😉
 

Attachments

  • 8AE4A16A-EAF5-4B3D-A40D-3C340D96896C.jpeg
    8AE4A16A-EAF5-4B3D-A40D-3C340D96896C.jpeg
    70.9 KB · Views: 22
  • F32CEFB7-8E1E-49E1-BAAB-8BC43C4B4191.jpeg
    F32CEFB7-8E1E-49E1-BAAB-8BC43C4B4191.jpeg
    76.5 KB · Views: 23
Top Bottom