The DIY thread - DIYourself

rlb

Well-Known Member
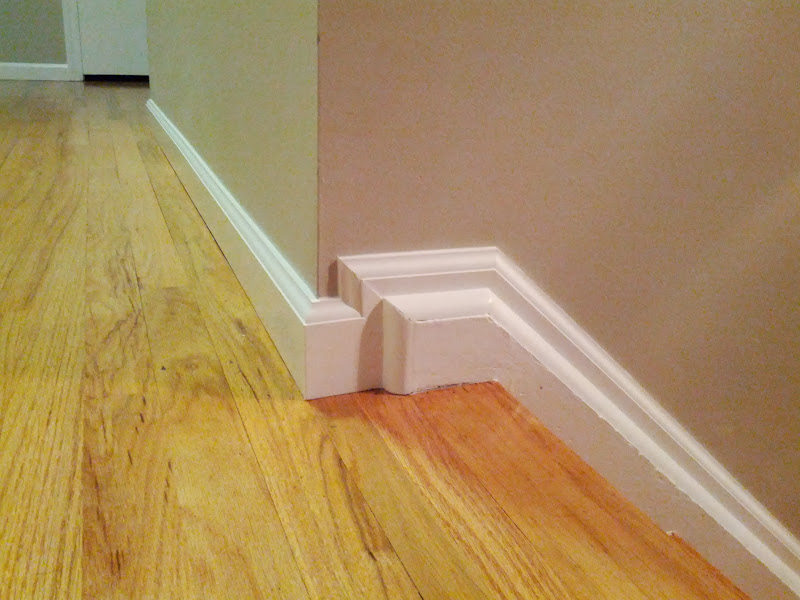
I figured it was about time to update my home improvement chronicles since the Pearls are whipping my ass. Since I last posted I was trying to finish up my molding. I kinda fell off for a while and skipped about a month of work. Finally got back into it because we were supposed to have a Christmas party tonight, so I'm about 90% done. I need a second coat of paint on a few doorways and I have a closet to paint. Also need to paint the kickers on the stairs.

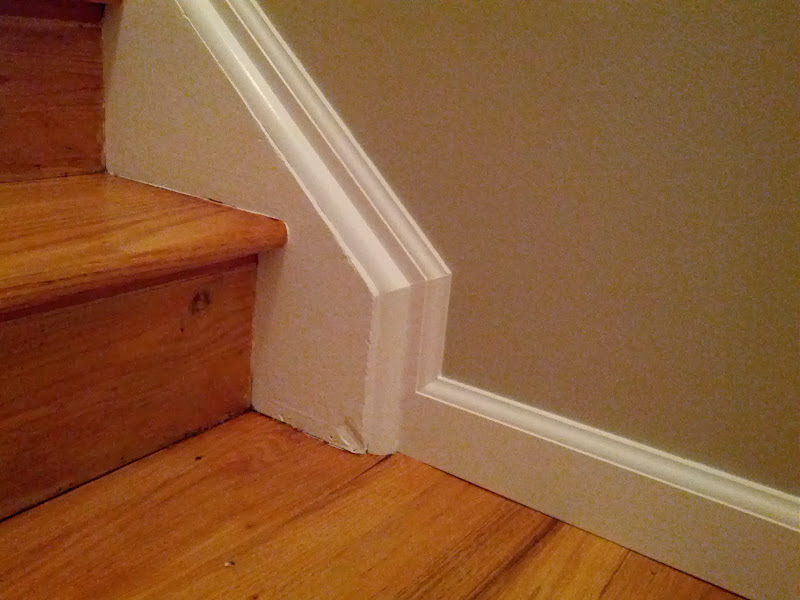
The stairs, inspired by bumblebee. Not perfect, but good enough.

IMG_20131214_212838.jpg


IMG_20131214_212853.jpg


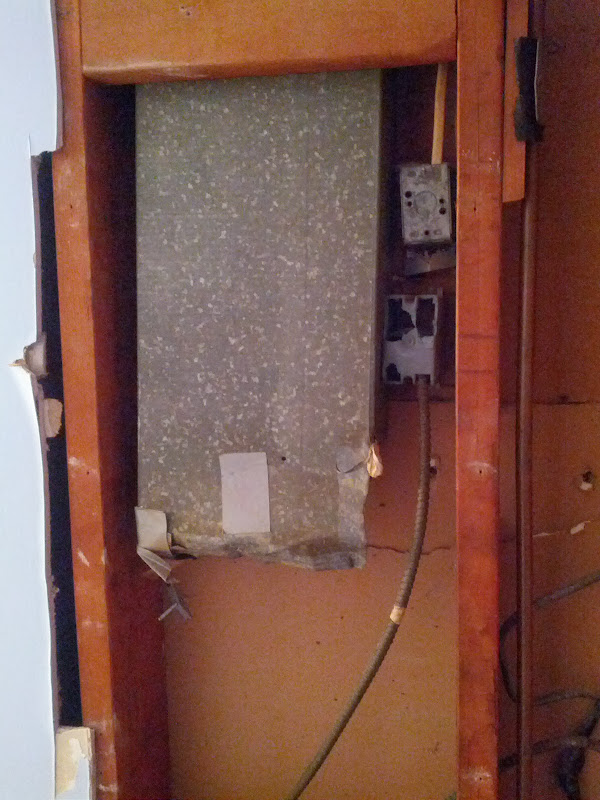
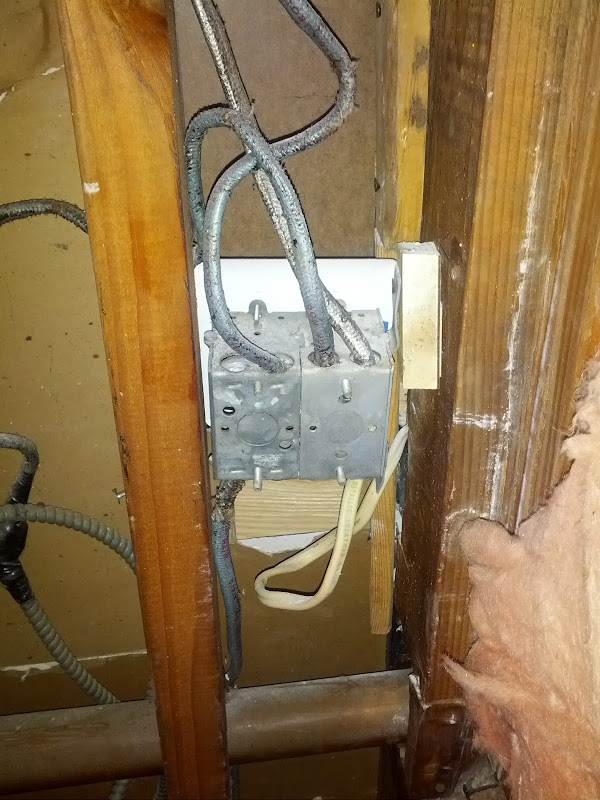
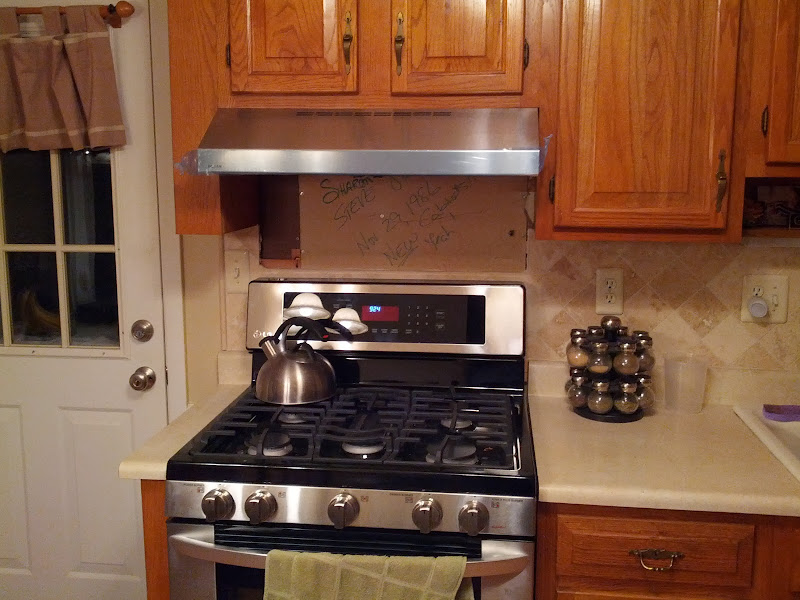
Since I have only minor detail work left I've moved on. We bought a new stove, washer and dryer pre black Friday. I wanted a new range hood to go with the stove so that was today's project.

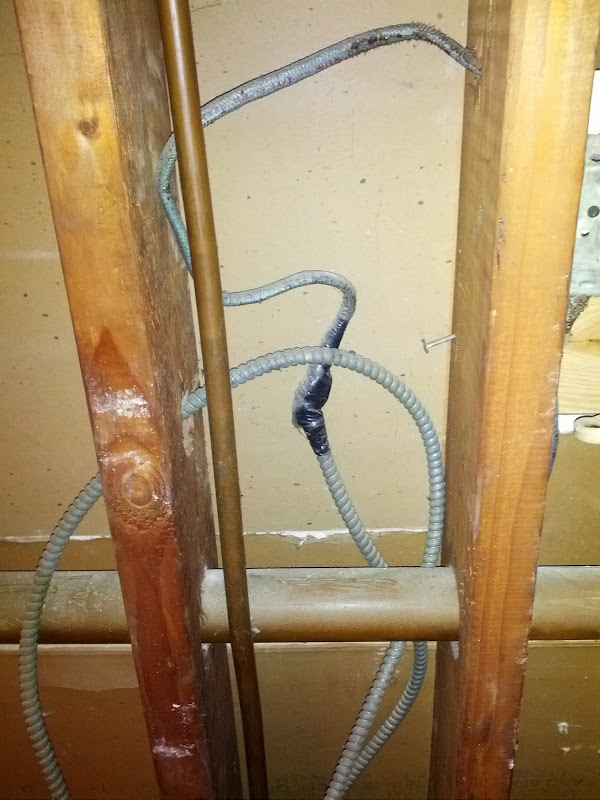
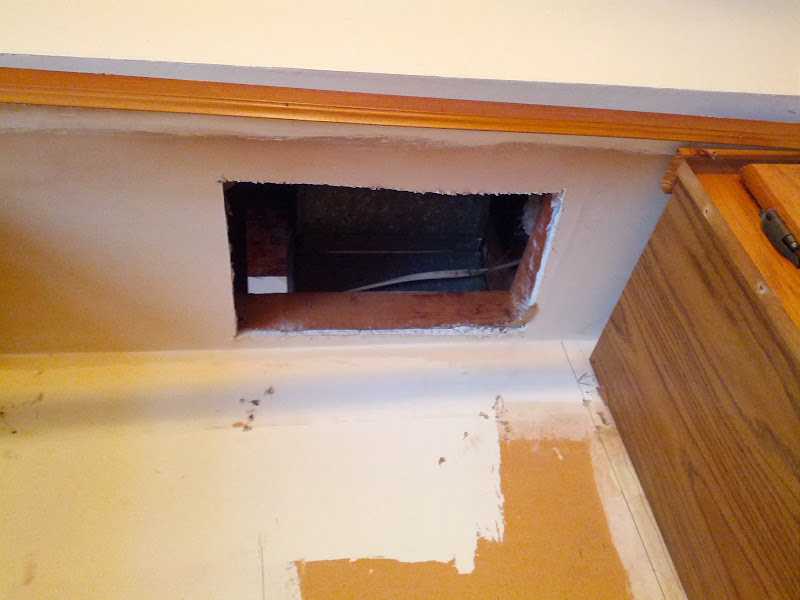
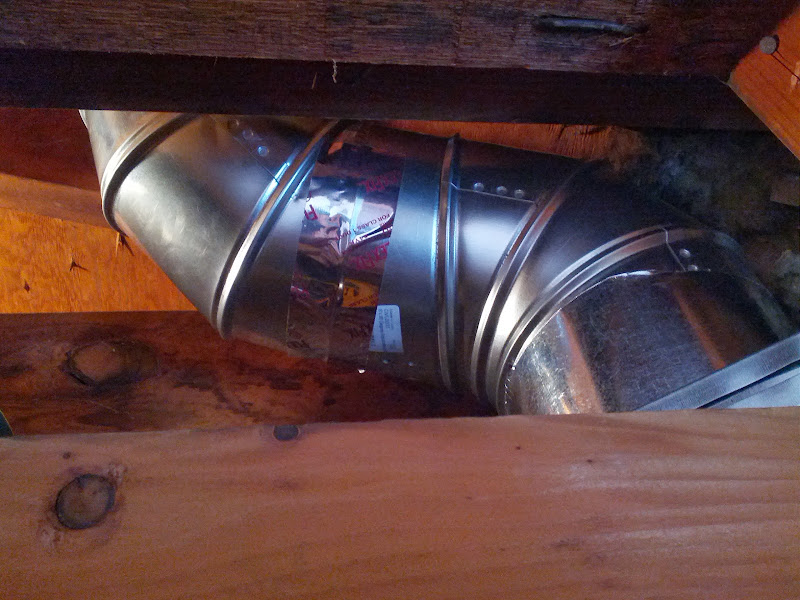
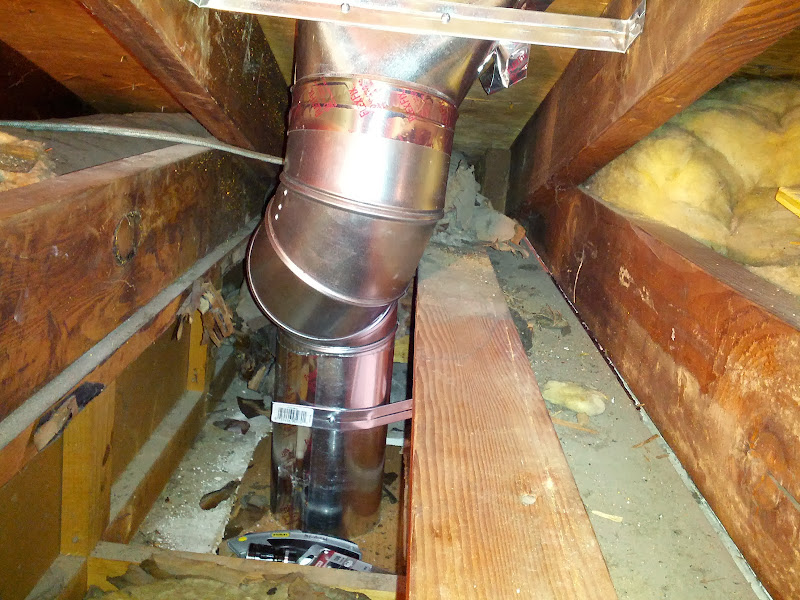
We had an over the raneg microwave but it was way too low. Also it wasnt vented outside, so I wanted to fix that too. Best annswer was just to replace it.

IMG_20131214_071856.jpg
 
Last edited:

rlb

Well-Known Member
There was an existing duct that way not being used. This is from the bathroom which shares a wall with the kitchen. Specifically this is my shower that's been torn apart since early September.

IMG_20131214_072900.jpg


You might notice a few other problems, which is part of why I haven't replaced the shower walls.


An old switch box turned into a buried junction box :rolleyes:

IMG_20131214_073410.jpg


Yep, electrical tape. At least there were wire nuts in there...

IMG_20131214_072921.jpg


This leads to a dead end box in the wall. I yanked it out and put in a temporary junction to replace the electrical tape. Going to have an electrician come in and clean up the other birds nest, I just don't feel like digging into it. Who knows WTF is going on there...
 

rlb

Well-Known Member
With the biggeste electrical problem fixed I yanked the old microwave to find this

IMG_20131214_085535.jpg


Sharon and Steve are assholes that didn't know WTF they were doing. Turns out they must have shifted the stove over a few inches in 1986 because the existing duct isn't centered over the stove. Guess that's why they didn't vent the microwave. This means I had to yank the existing duct out and make it work with new stuff.

Naturally the roof cap is in a barely accesible place in the attic

IMG_20131214_134832.jpg


Actually it needs to be moved a few inches towards the soffit to be centered over the stove, that will be a spring project. I don't really feel like tearing into the roof in December. For now I'll just deal with a few elbows to get everything connected up.

A look at the off center duct from a hole in the ceiling. This is with the cabinet removed.

IMG_20131214_133333.jpg


I finsihed all my cutouts and pieced everything together. I don't have the duct connected though because I fell about 4 inches short. I need to go to the depot in the morning and get some more pieces to finish up. But from the kitchen it all looks good. Well maybe not all...

IMG_20131214_212445.jpg


Once I get the ductwork squared away I'll just wind up yanking the hood again anyway to replace the drywall behind it. Once I get a solid wall I'll extend the backsplash. There were some extra tiles in the house when we bought it, I'm hoping it will be enough.

I should probably install the GFCIs I bought while I'm in an electrical mood...
 

Patrick

Overthinking the draft from the basement already
Staff member
Nice work on the molding build-up.

glad u got the m/w out from over the range.
this is done just to save the builder $$... Has probably caused
more kitchen accidents over the years!

combo of bx and cloth covered wire. interesting.
good to see those issues being addressed -

icon14.gif
 

michael.su

JORBA Board Member/Chapter Leader
JORBA.ORG
Wifey got hit by a buck a month ago...
The estimate to fix the car was 7K+ so the ins company totaled it and sent us a check for $5500. After pricing parts at ~$1500, i decided to fix it myself. The car is mechanically sound, the damage was all cosmetic.
Fender, rad support, hood, bumper, head light,
Windshield, etc.
Most stuff was bolt on except the rad support upper tie bar, that needed to be riveted/welded.
I tore it all down and have started reassembly this week.

After buck:
ImageUploadedByTapatalk1387109614.177509.jpg

Disassembled:
ImageUploadedByTapatalk1387109729.194038.jpg

More to come...
 

THATmanMANNY

Well-Known Member
Nice work, rlb!

Mike, sweet.
However, did you have to pay to buy it back. Also, how will you retitle it? NJ has some very touchy rebuilt salvage title laws like only using parts with recipts and a cert mechanic. At least that's what I came up with when I wanted to rebuild a totaled car
 

michael.su

JORBA Board Member/Chapter Leader
JORBA.ORG
Nice work, rlb!

Mike, sweet.
However, did you have to pay to buy it back. Also, how will you retitle it? NJ has some very touchy rebuilt salvage title laws like only using parts with recipts and a cert mechanic. At least that's what I came up with when I wanted to rebuild a totaled car

I did have to reimburse the ins co $500 for salvage value. in my case, the title is still good because it was never signed over.
It's different if you buy a car that went to a salvage yard...then you need a salvage title.
I know that if i want to put comprehensive back on the car has to be inspected by a body shop. (They always do when applying for comp)
 

THATmanMANNY

Well-Known Member
so what kind of title will it have when you are done? when you are done do you have to get it inspected? or any special DMV processes?
 

michael.su

JORBA Board Member/Chapter Leader
JORBA.ORG
so what kind of title will it have when you are done? when you are done do you have to get it inspected? or any special DMV processes?

Same title, it never left my ownership.
It wasn't totaled because it was considered structurally compromised, it was totaled because it would cost more for the shop to fix it than the estimated value of the car. So they cut me a check for what it was worth - the scrap value.
No inspection or DMV process. It will be back to the way it was except with some after market parts and some fresh paint.
 

jmanic

JORBA Board Member/Chapter Leader
Staff member
JORBA.ORG
Team MTBNJ Halter's
Nice work on the molding and good work cleaning up someone else's mess.
It's good to re-do things properly, and important when electricity is involved.

This was my last project- re-doing the small deck out back.
I think Steve and Sharon built it originally.
They didn't use pressure treated wood for the joists or stringers, and no galvanized fasteners.
On top of that, joists were toe-nailed to 2 layers of scraps to attach them to the rim joists. Needless to say, it was all pretty rotten and loose by the time I pulled it apart.
Rather than reinvent the wheel, I re-did their design, except better executed.
I added a couple of joists to box in the posts, added a third stringer, and used joist hangers and exterior grade fasteners.
To finish it off, I'll be replacing the lattice work they had between the posts with some vertical slats and may do something more interesting with the railings (currently 2x4's).
Then power wash and paint in the spring.
 

Attachments

  • Photo2.jpg
    Photo2.jpg
    123.3 KB · Views: 41
  • Photo4.jpg
    Photo4.jpg
    112.1 KB · Views: 40

rlb

Well-Known Member
Nice work on the car Michael. On a car I've torn into just about everything but a trans rebuild and body work. I know it's not easy to get the panels lined up, looking foward to seeing some good finished pics!

As for the deck, it scares me that people don't understand the importance of the rim joist connection. Steve and Sharon built the deck on my house too, luckily the previous owned re-did most of it before the house went up for sale. From what the neighbors tell me it wasn't pretty before that. Your rebuild looks good!
 

rlb

Well-Known Member
After about six hours and shimmying into the crevice of my attic countless times, I got the ductwork bastardized together. I was able to find a boot that fit the existing roof opening pretty well. I did have to cut away some sheathing but it was all under the existing cap. I made one cut by hand with about 1.5 inches of saw stroke, then I remembered I have an OMT. That made quick work of the remaining cuts.

It got to the point where I was yelling for my wife to hand me tools through the non-existant shower wall. I'm pretty sure that I'd still be up there trying to get everything together if I didn't have that secondary access. I trimmed the main duct through the shower wall making 2 or 3 cuts at a time, then spinning the duct from the kitchen and making a few more cuts.

After the cuts I tried final assembly from the attic, but lining up 2 elbows with minimal room to move was nearly impossible. I taped up the top elbow then wrestled the bottom elbow through the shower wall for about 15 minutes and I finally go it together. A few straps later I'm left with this:

Shower wall view:
IMG_20131215_130747.jpg


Attic View:
IMG_20131215_131252.jpg


Not perfect by any stretch but it works for now. In the spring I'll put in a proper cap directly above the stove so I'll only have one vertical 7" duct.
 

michael.su

JORBA Board Member/Chapter Leader
JORBA.ORG
Some how i managed to get it all back together today except for the wheel house trim which i will put on after paint. So paint is all i have left...and a windshield but that, i'll have a professional do. :D

ImageUploadedByTapatalk1387151847.656495.jpg
 

rlb

Well-Known Member
Some how i managed to get it all back together today except for the wheel house trim which i will put on after paint. So paint is all i have left...and a windshield but that, i'll have a professional do. :D

Looking good so far!
 

olegbabich

Well-Known Member
Nice job on Hood and the test looks tasty.

I did a Hood in our house 10 years ago. Still runs.:)
 

Attachments

  • IMG_0780[1].JPG
    IMG_0780[1].JPG
    105.8 KB · Views: 58
  • IMG_0782[1].JPG
    IMG_0782[1].JPG
    81.5 KB · Views: 56

rlb

Well-Known Member
Nice, that's a real elbow!

Test was tasty indeed, but using the cast iron skillet was a poor choice. All the liquid + 1 hour in the oven took off what little seasoning the skillet had.
 

jmanic

JORBA Board Member/Chapter Leader
Staff member
JORBA.ORG
Team MTBNJ Halter's
Nice job with the ductwork, and the range and hood look awesome.
And Founders to wash down the taste test- nice!
I put in a non-vented hood (no place for ducts) for light and to circulate the smell of bacon. It's stainless, which means eventually everything is going to be stainless...
So far kitchen has gotten new floor, paint (replacing wallpaper), painted cabinets/replaced hardware, counter (let the pros handle that), tiled backsplash, windows (pros) and some new fixtures. Happy to invest in that as much time as we spend in there. Next will be removing/replacing a radiator and putting in either a floating countertop or something with cabinets/shelves.

Other indoor winter projects will be touching things up, going to try my hand at fixing plaster bubbles. Not optimistic on that one. May just put up wall hangings.
 
Top Bottom